Surprise – you’ve got mad skills!
Everyone thinks their perception is a reality. Sure, you know deep down that if you bake one cake, it doesn’t make you a baker. Or if you paint one house, it doesn’t make you a painter. But the legal software and technology world is funny; suddenly, if you do one little fix on someone’s computer, word spreads like wildfire, and the event automatically makes you the I.T. expert at your office! Then again – if there is one thing we truly enjoy, it is producing extraordinary results (according to others) with only ordinary integrity (according to what you do).
Today I am going to walk through one such simple task that will drop the jaws of your fellow co-workers: a Worldox installation on a workstation. Once the PC requirements are met, anyone can do this task! It is that straightforward and only seems daunting to the untrained eye. Here are the requirements that the new computer must have first before proceeding:
- The PC needs to be joined to the firm’s domain that all other PCs running Worldox are joined to;
- The PC must have the same drive mappings as all other PCs that run Worldox; and
- The user account should have local administrator rights, or you must have the credentials on hand for entering the administrator’s account.
Confirmed this with your I.T. person? Cool, now let us get to the fun part:
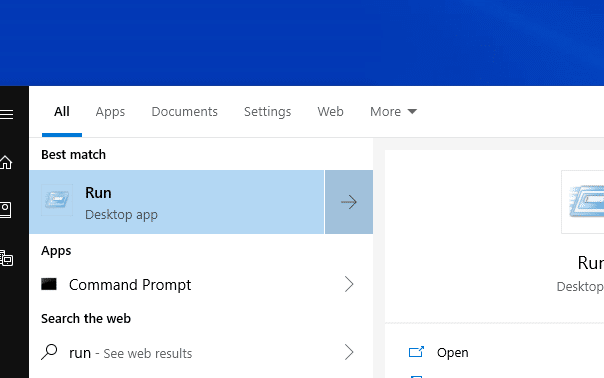
- Go to the PC’s Start menu on the bottom-left corner and type “Run” in the search box. Once you find the Run desktop app, click on it to launch.
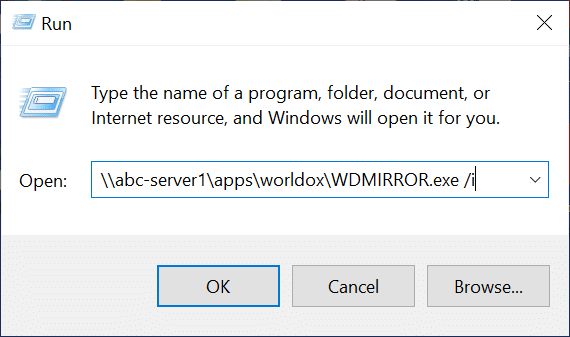
- Type in the network path of where Worldox is installed on the network. It may look something like this: \abc-server1appsworldoxPRO TIP: You can confirm the network path by going to another user’s Worldox program, then clicking on Help > About Worldox to launch the “GX – About” window and clicking Ctrl + D. The network path will be by the “Worldox INIs” Type.
- Next, add the following language at the end of the network path string: EXE /i . The field in the Run app will now look like this: \abc-server1appsworldoxWDMIRROR.EXE /i
PRO TIP: the “ i” command line switch is what makes it perform a mirror (aka matching) installation of Worldox on a local PC. If you want to install the shortcuts silently (where they skip the closing dialog towards the end) add the “ is” command line switch in addition to “ i”. The latter command line switch would be specifically for batch files and other automated installation procedures.
- Click OK to activate the install/mirroring process.
- Boom! Worldox! Rejoice!
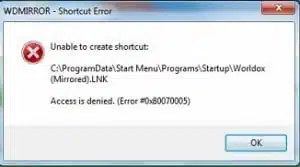
HOWEVER – sometimes the PC will not have access to create shortcuts on the Desktop and Start Menu, and error messages like this might appear:
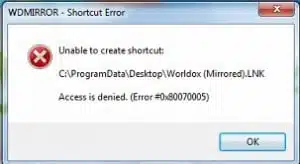
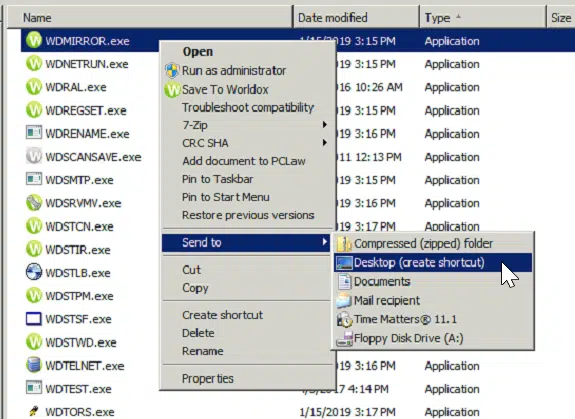
No need to panic! Go to your C:Worldox folder that you just created, find WDMIRROR.EXE, right click and simply select “Send to > Desktop (create shortcut).”
And that is how you install Worldox on a single workstation. Now go out there and make your co-workers jealous of your mad computer skills!
If you have any questions about installing Worldox, how to graciously accept accolades from your colleagues or any Worldox features, just send us an email at info@affinityconsulting.com or request a consultation. You can also call us at 877-676-5492.
{{cta(‘f63d1612-07e6-4cc2-bbd4-3baa2f5220e6’)}}

